What is an ADSR envelope?
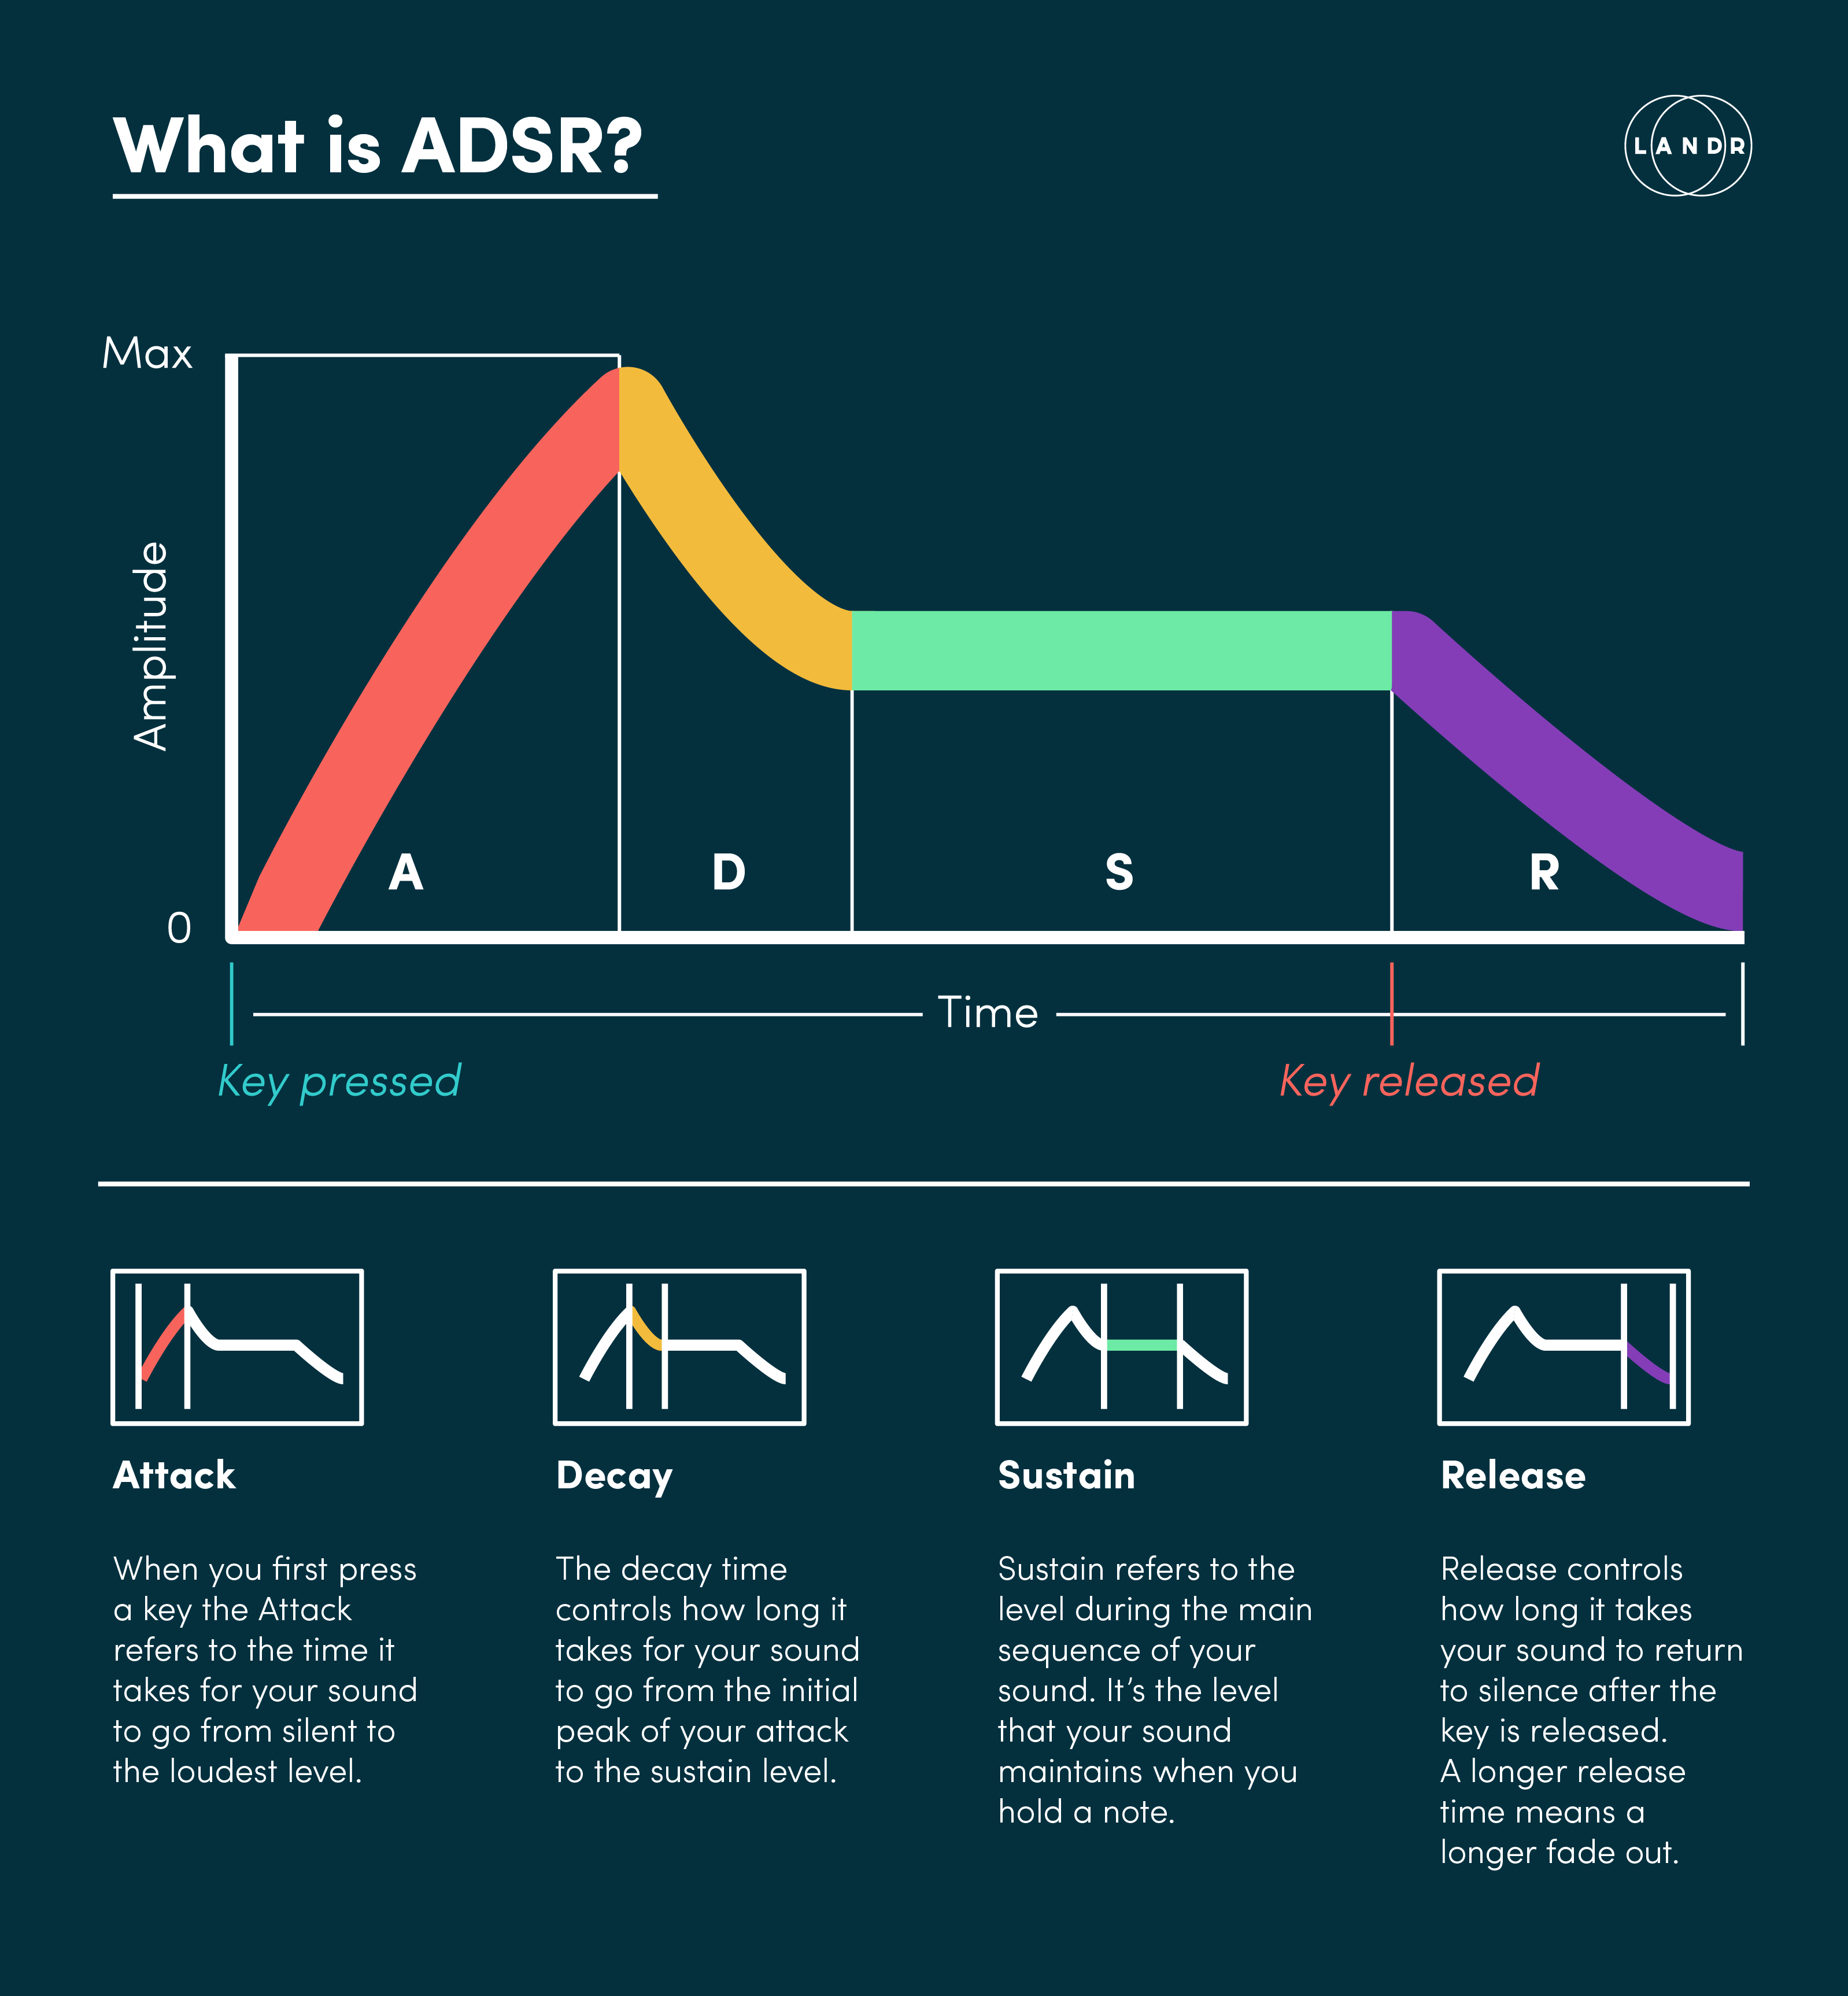
ADSR is the Attack, Decay, Sustain and Release of a sound. Together, they make up the ADSR envelope. An ADSR envelope determines how a sound unfolds over time.
All sound can be described using ADSR.
For example: An angry dog bark has a fast attack and fast release while that squeaky door you’ve been meaning to fix has a slow attack with a medium sustain and long release.
Confused? Maybe I’m getting ahead of myself… Let’s start with the basics.
ADSR envelopes are most easily understood through tweaking synthesizer sounds. So I’ll be talking about ADSR with synthesizer sounds in mind. But ADSR envelopes are also used with effects, samples, and even LFOs.
Here’s what each part of ADSR means and stands for:
How to Use ADSR
Now that you know what ADSR is, it’s time to figure out how and when to use each parameter to get the perfect sound.
There’s infinite uses for ADSR. But there’s some specific applications that are really useful no matter what instrument you’re working with.
Applying it right won’t always have a dramatic effect. But making subtle changes with ADSR will have an overall effect on the quality of your mixes and productions.
So here’s 5 useful ways to use ADSR throughout your process:
1. Use a long attack time and long release time to build beautiful pads
Big lush pads the perfect accent to any track. Creating them by tweaking ADSR times is a super easy way to make your own custom pad sounds.
Do it with your favourite hardware synth or synth VST.
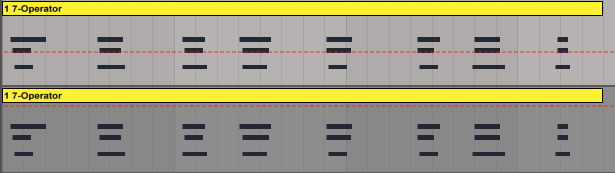
To make it clear, let’s compare the same MIDI notes, but different attack and release times. Here’s the MIDI pattern I set up as an example.

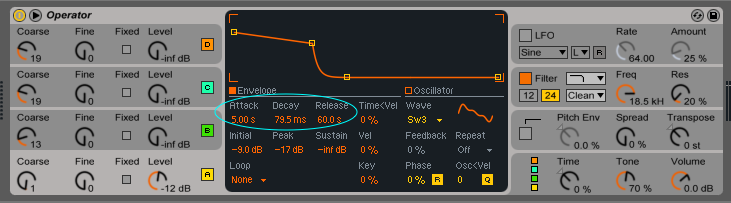
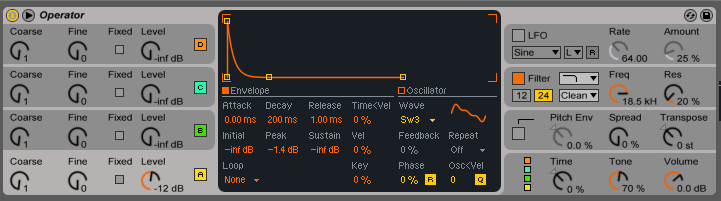
I used Ableton Live’s built-in Operator synth. But the same concepts work for any VST synth and DAW with ADSR controls, just play with the settings to find your flavour.
Use a medium attack time with medium decay. Set a long release time to get some nice juicy pads to fill out your next track. Here’s how I set the ADSR and how it sounds:
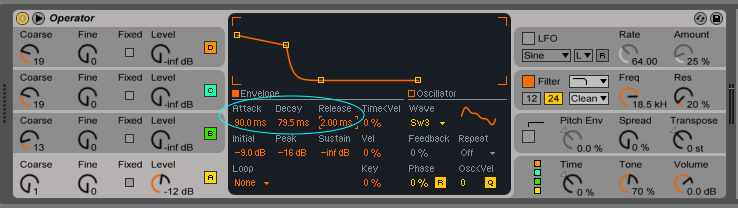
If you set a fast attack and fast release your pads will sound plucked. They won’t have that lush effect but they’re great for other lead sounds or percussive FX. These are the settings and how they sound:
Use your custom pads as leads or lower end bass. It’s up to you. No matter how you use it, ADSR makes creating custom pads a breeze.
2. Keep your attack time at zero with a fast release to get a staccato sound
Fire up your favourite hardware or VST synth. Keep your attack time at zero to get a sound that hits immediately. A fast attack is perfect if you’re looking for a staccato effect on a specific sound.
Low or short attack times are also perfect for synthesizing percussive sounds like toms, snares or hi-hats. It’s also the secret for creating perfect trance stabs.
Let’s make another comparison using the same MIDI notes but different attack and release times. I used Ableton Live’s Operator again.
Set your attack at zero and a fast release to make groovy staccato stabs. Here’s how I set it and how it sounds:
If you set a longer attack time and a long release, you get a glissando instead. Glissando will give you a slide effect between each note. Here are the settings and how it sounds:

Hot Tip: Create a percussive sound with a fast attack and slow release time to put some nice tails on a snare or hi-hat type sound (more on this in a sec).
3. Give your high register percussion nice resonant tails with a slower release time
Another trick for synthesized percussion is to stretch the release time out.
If you’re synthesizing percussive sounds like a hi-hat, crash or snare applying a long release time will you give you some nice long tails. The tail is pretty obvious in the waveform below:

Here’s how our long tail waveform sounds:
Keeping the tails on your sounds will give your track some added texture and space without applying effects right away.
Hot Tip: Try reversing percussive sounds with longer release times to get a nice building effect.
4. Adjust your attack to remove clicks or whacks at the start of samples
If you chop a sample from the middle of a WAV form a common problem is clicks or blips at the start of the sample.
Slightly adjusting the Attack time to be longer will get rid of the initial clicks and pops that you might be hearing. It’s basically a tiny automated fade-in.
Here’s how I did it using Ableton Live’s Simpler instrument. Try it on any sampler, whether it’s a plugin or hardware.
I set a longer attack time and here’s how it sounds:

So stop trying to zoom in on that waveform to find the perfect starting point. Just adjust the attack and fix ‘em up quick.
5. Highlight your Transients with a slow decay and lower sustain level
If you’re using a pad or lead sound with a lot of energy at the start, a medium decay with a lower sustain level is a great way to highlight the early transients.
Transients are the high points of your waveform where the most energy happens. A lower sustain and medium decay emphasizes the initial punch and energy of a sound without letting it overpower all the other elements of your arrangement.
So keeping your sustain lower is a great way to give your track some dynamic peaks and valleys. It will overall make your track more interesting to the ear.
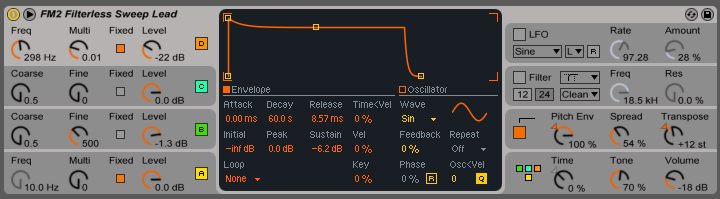
Here’s how I set it and how it sounds. ‘FM2 Filterless Sweep Lead’ preset under Operator in Ableton Live.

The
initial energy of the sound is there. But the lower sustain level gives it some room to breath after the initial hit.
Now let’s compare it to a higher sustain and longer decay—without changing anything else.
The sound is more overpowering and big. It might be subtle on its own. But you risk drowning out other elements in your mix and burying the initial energy of your synths.
Here’s what the settings look like and how it sounds: